Out for a walk one day, a woman came across a construction site and saw three men working. She asked the first man, “What are you doing?” Annoyed by the question, the first man barked, “Can’t you see that I’m laying bricks?” Not satisfied with the answer, she asked the second man what he was doing. The second man answered, “I’m building a brick wall.” Then, turning his attention to the first man, he said, “Hey, you just passed the end of the wall. You need to take off that last brick.” Again not satisfied with the answer, she asked the third man what he was doing. And the man said to her while looking up in the sky, “I am building the biggest cathedral this world has ever known.” While he was standing there and looking up in the sky the other two men started arguing about the errant brick. The man turned to the first two men and said, “Hey guys, don’t worry about that brick. It’s an inside wall, it will get plastered over and no one will ever see that brick. Just move on to another layer.”
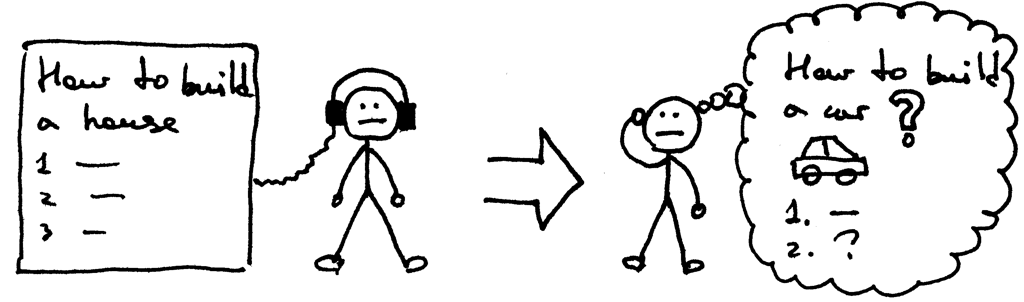
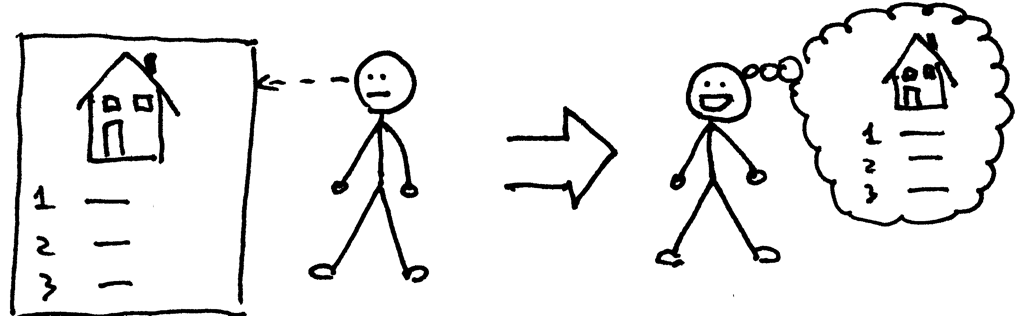
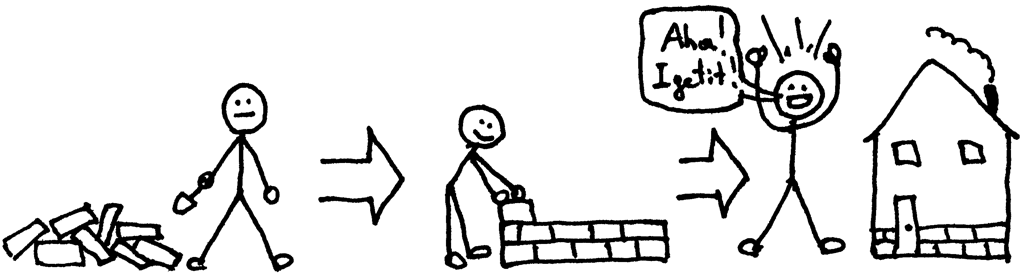
The moral of the story is that when you know the whole system and understand how different pieces fit together (bricks, walls, cathedral), you can identify and fix problems faster (errant brick).
What does it have to do with creating your own Web server from scratch?
I believe to become a better developer you MUST get a better understanding of the underlying software systems you use on a daily basis and that includes programming languages, compilers and interpreters, databases and operating systems, web servers and web frameworks. And, to get a better and deeper understanding of those systems you MUST re-build them from scratch, brick by brick, wall by wall.
Confucius put it this way:
“I hear and I forget.”
“I see and I remember.”
“I do and I understand.”
I hope at this point you’re convinced that it’s a good idea to start re-building different software systems to learn how they work.
In this three-part series I will show you how to build your own basic Web server. Let’s get started.
First things first, what is a Web server?
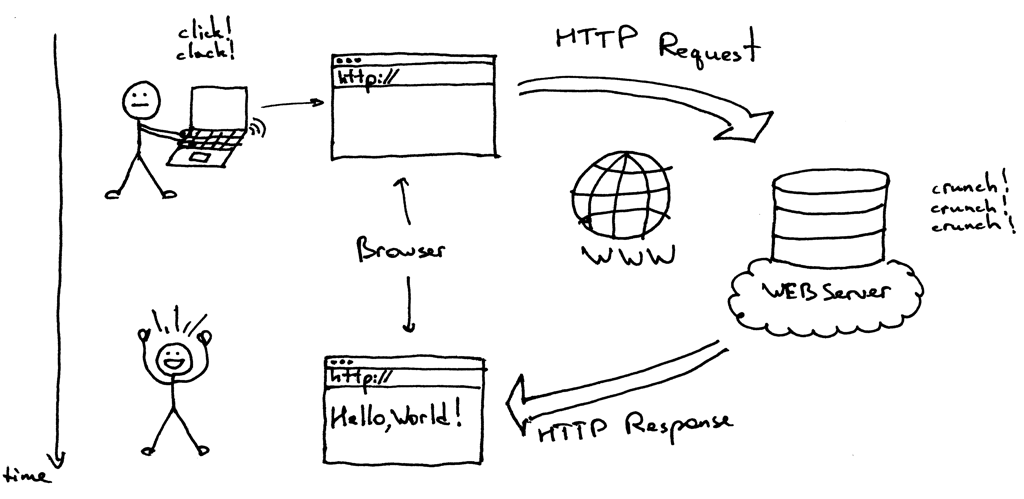
In a nutshell it’s a networking server that sits on a physical server (oops, a server on a server) and waits for a client to send a request. When it receives a request, it generates a response and sends it back to the client. The communication between a client and a server happens using HTTP protocol. A client can be your browser or any other software that speaks HTTP.
What would a very simple implementation of a Web server look like? Here is my take on it. The example is in Python (tested on Python3.7+) but even if you don’t know Python (it’s a very easy language to pick up, try it!) you still should be able to understand concepts from the code and explanations below:
# Python3.7+
import socket

HOST, PORT = '', 8888

listen_socket = socket.socket(socket.AF_INET, socket.SOCK_STREAM)
listen_socket.setsockopt(socket.SOL_SOCKET, socket.SO_REUSEADDR, 1)
listen_socket.bind((HOST, PORT))
listen_socket.listen(1)
print(f'Serving HTTP on port {PORT} ...')
while True:
    client_connection, client_address = listen_socket.accept()
    request_data = client_connection.recv(1024)
    print(request_data.decode('utf-8'))

    http_response = b"""\
HTTP/1.1 200 OK

Hello, World!
"""
    client_connection.sendall(http_response)
    client_connection.close()
Save the above code as webserver1.py or download it directly from GitHub and run it on the command line like this
$ python webserver1.py
Serving HTTP on port 8888 …
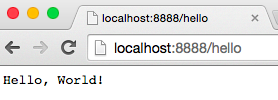
Now type in the following URL in your Web browser’s address bar http://localhost:8888/hello, hit Enter, and see magic in action. You should see “Hello, World!” displayed in your browser like this:
Just do it, seriously. I will wait for you while you’re testing it.
Done? Great. Now let’s discuss how it all actually works.
First let’s start with the Web address you’ve entered. It’s called an URL and here is its basic structure:
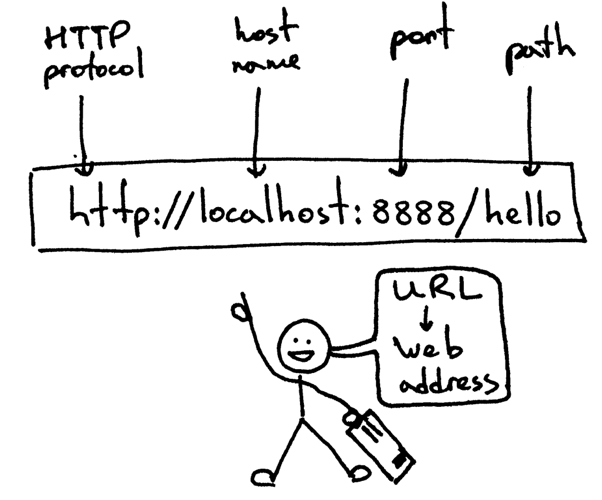
This is how you tell your browser the address of the Web server it needs to find and connect to and the page (path) on the server to fetch for you. Before your browser can send a HTTP request though, it first needs to establish a TCP connection with the Web server. Then it sends an HTTP request over the TCP connection to the server and waits for the server to send an HTTP response back. And when your browser receives the response it displays it, in this case it displays “Hello, World!”
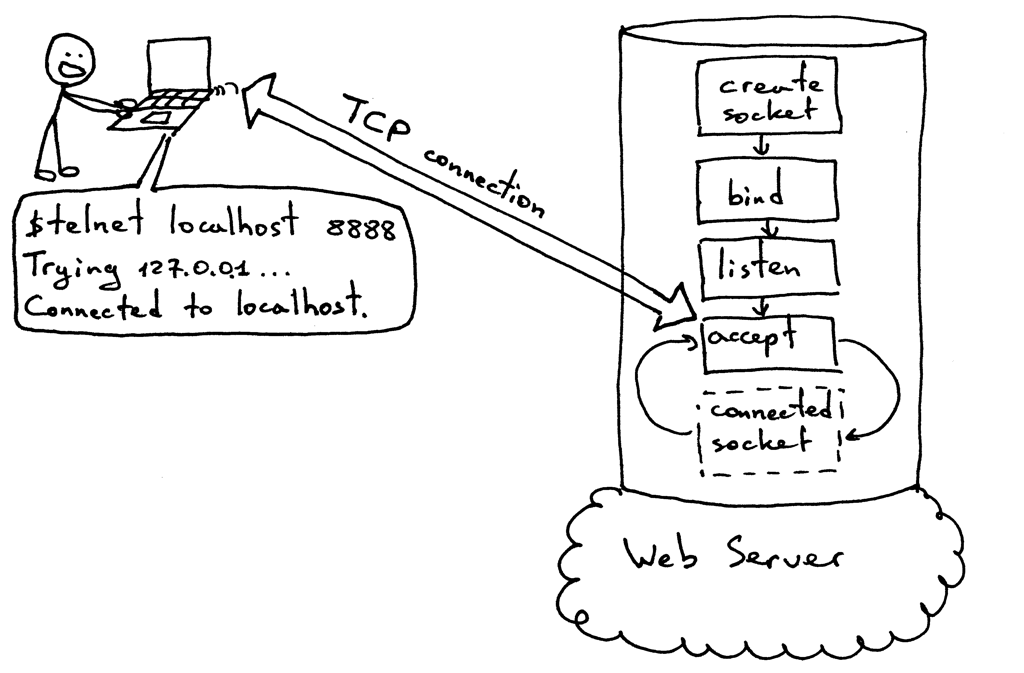
Let’s explore in more detail how the client and the server establish a TCP connection before sending HTTP requests and responses. To do that they both use so-called sockets. Instead of using a browser directly you are going to simulate your browser manually by using telnet on the command line.
On the same computer you’re running the Web server fire up a telnet session on the command line specifying a host to connect to localhost and the port to connect to 8888 and then press Enter:
$ telnet localhost 8888
Trying 127.0.0.1 …
Connected to localhost.
At this point you’ve established a TCP connection with the server running on your local host and ready to send and receive HTTP messages. In the picture below you can see a standard procedure a server has to go through to be able to accept new TCP connections.
In the same telnet session type GET /hello HTTP/1.1 and hit Enter:
$ telnet localhost 8888
Trying 127.0.0.1 …
Connected to localhost.
GET /hello HTTP/1.1

HTTP/1.1 200 OK
Hello, World!
You’ve just manually simulated your browser! You sent an HTTP request and got an HTTP response back. This is the basic structure of an HTTP request:
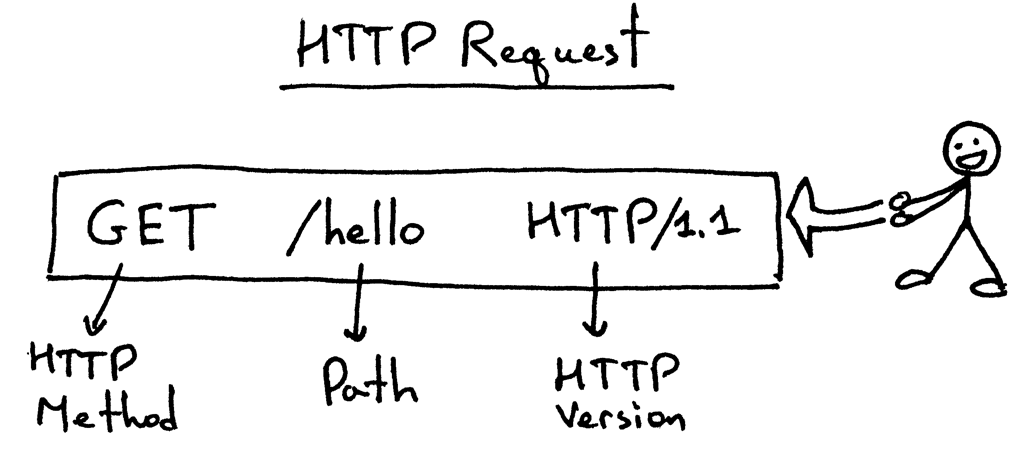
The HTTP request consists of the line indicating the HTTP method (GET, because we are asking our server to return us something), the path /hello that indicates a “page” on the server we want and the protocol version.
For simplicity’s sake our Web server at this point completely ignores the above request line. You could just as well type in any garbage instead of “GET /hello HTTP/1.1” and you would still get back a “Hello, World!” response.
Once you’ve typed the request line and hit Enter the client sends the request to the server, the server reads the request line, prints it and returns the proper HTTP response.
Here is the HTTP response that the server sends back to your client (telnet in this case):
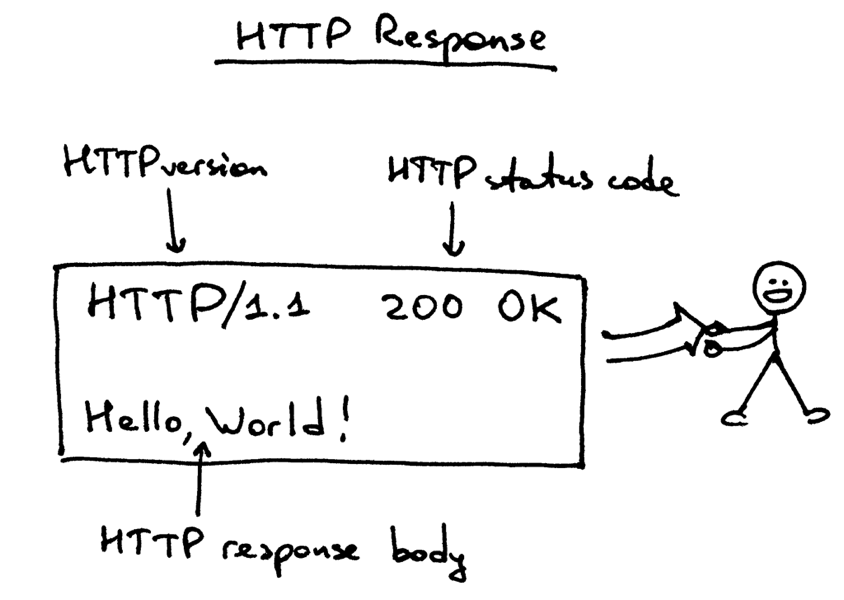
Let’s dissect it. The response consists of a status line HTTP/1.1 200 OK, followed by a required empty line, and then the HTTP response body.
The response status line HTTP/1.1 200 OK consists of the HTTP Version, the HTTP status code and the HTTP status code reason phrase OK. When the browser gets the response, it displays the body of the response and that’s why you see “Hello, World!” in your browser.
And that’s the basic model of how a Web server works. To sum it up: The Web server creates a listening socket and starts accepting new connections in a loop. The client initiates a TCP connection and, after successfully establishing it, the client sends an HTTP request to the server and the server responds with an HTTP response that gets displayed to the user. To establish a TCP connection both clients and servers use sockets.
Now you have a very basic working Web server that you can test with your browser or some other HTTP client. As you’ve seen and hopefully tried, you can also be a human HTTP client too, by using telnet and typing HTTP requests manually.
Here’s a question for you: “How do you run a Django application, Flask application, and Pyramid application under your freshly minted Web server without making a single change to the server to accommodate all those different Web frameworks?”
I will show you exactly how in Part 2 of the series. Stay tuned.
Resources used in preparation for this article (links are affiliate links):
-
Unix Network Programming, Volume 1: The Sockets Networking API (3rd Edition)
-
The Linux Programming Interface: A Linux and UNIX System Programming Handbook
UPDATE: Sat, July 13, 2019
Updated the server code to run under Python 3.7+
Added resources used in preparation for the article
If you want to get my newest articles in your inbox, then enter your email address below and click "Get Updates!"
All articles in this series:
Comments
comments powered by Disqus